

Top
Author
Published
7 Jul 2022Form Number
LP1617PDF size
6 pages, 472 KBSubscribed to LP1617.
Thank you for your feedback.
Abstract
Microsoft recently announced support for single node cluster support on Azure Stack HCI. Lenovo Edge solutions like ThinkAgile MX1020, MX1021 and SE450 and 1U rack server based MX3330 solutions are ideal for customers to place in remote locations where they need a low-cost and compact hybrid cloud solution. This document is intended for IT personnel with knowledge on Windows server and hybrid cloud solutions.
Introduction
This document describes the deployment process of a single node cluster on Azure Stack HCI. Azure Stack HCI support for single node cluster was recently released by Microsoft in order minimize the hardware costs for locations that don`t require a high resiliency. The feature was announced on May 24, 2022, at the Microsoft Build event.
This document provides an overview of the Azure Stack HCI single node cluster support, steps in the deployment process, requirements, and considerations for this deployment type.
For setting up the Azure Stack HCI cluster it is necessary for the node to have access to a windows domain. Once the connection is in place we can already go forward with the installation.
Installation
Once the Azure Stack HCI operating system is running the cluster installation can be started.
At this moment the one node cluster can only be created over powershell (it can still be managed from Windows Admin center).
Before creating the cluster, the appropriate features needs to be installed by running the following command:
Install-WindowsFeature -Name Hyper-V, Failover-Clustering, FS-Data-Deduplication, Bitlocker, Data-center-Bridging, RSAT-AD-Powershell, NetworkATC -IncludeAllSubFeature -IncludeManagementTools -Verbose
The output is shown in the following figure.
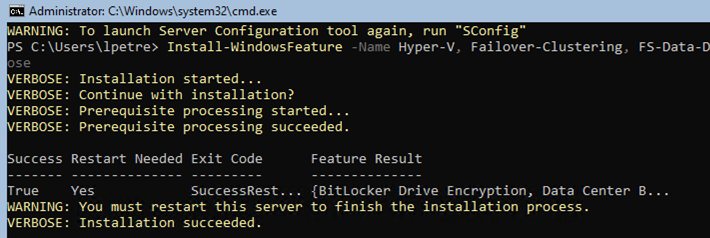
Figure 1. Feature Installation
Once the features are installed the cluster can be created by running the following command:
New-Cluster -Name ClusterName -Node nodename -NoStorage
The output is shown in the following figure.
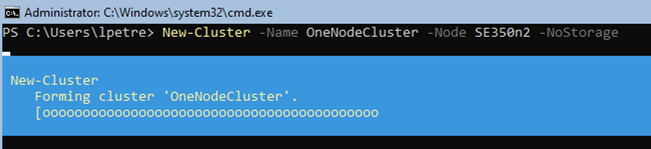
Figure 2. Cluster Creation
And then Storage Spaces Direct Can be enabled by using typing in the following:
Enable-ClusterS2D -verbose
The output is shown in the following figure.
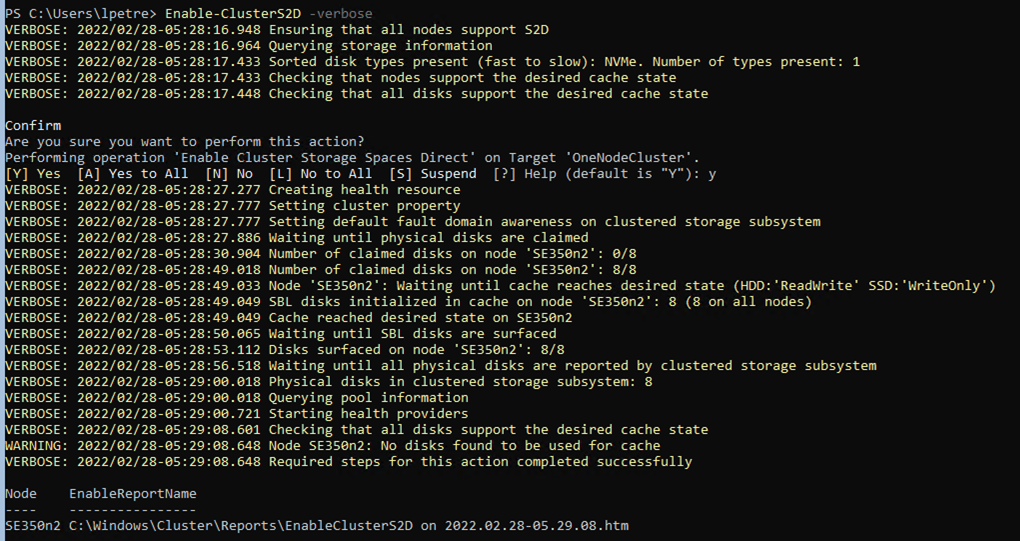
Figure 3. Enabling S2D
Cluster Management
After the cluster was created it can be managed like any other cluster, by using Windows Admin Center, Failover Cluster Manager or with PowerShell commands.
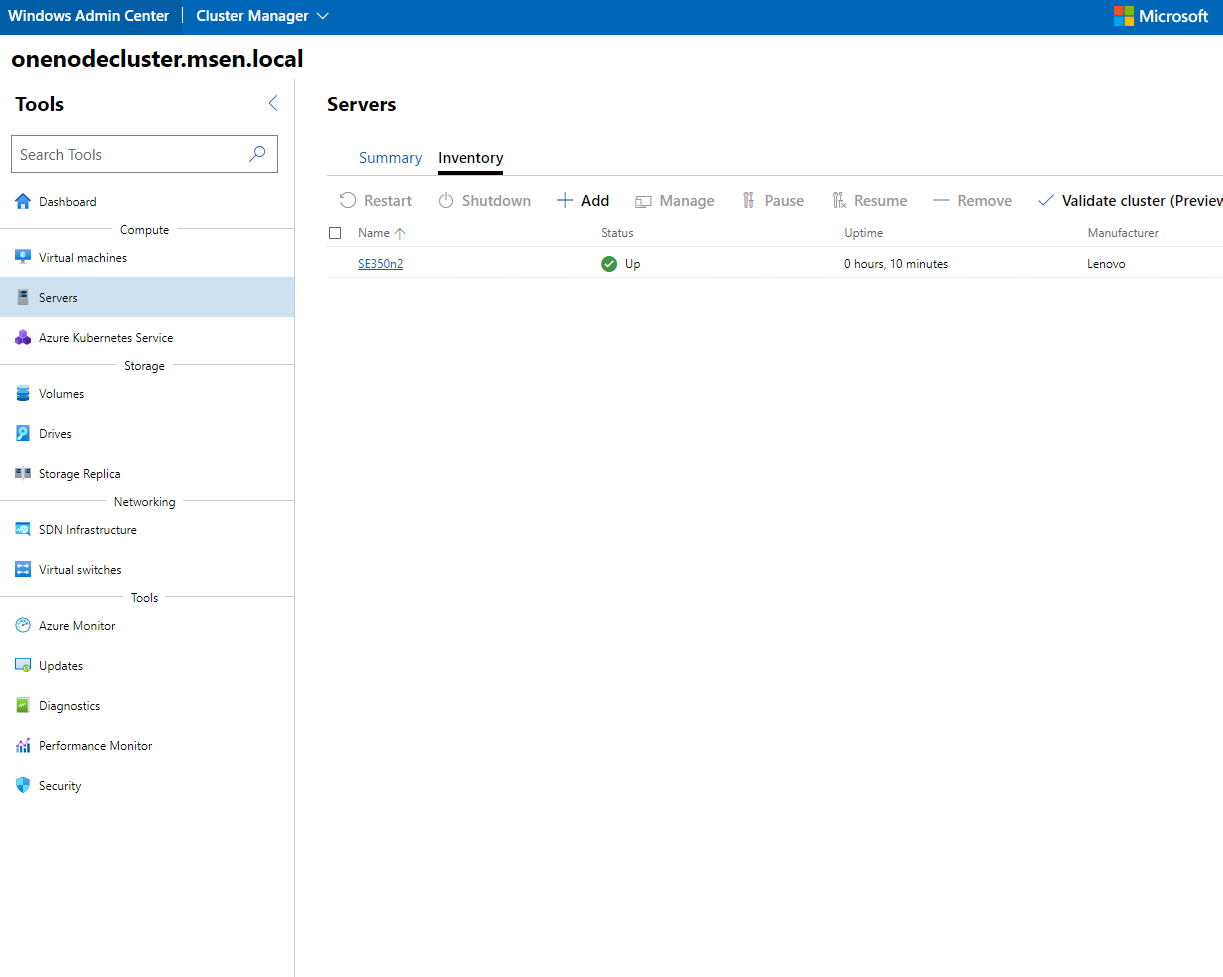
Figure 4. WAC management
Notes and considerations
Before deploying a one node cluster special analysis must be done so that it will be deployed for services that can tolerate downtime in case of a prolonged power failure or physical issues that might occur.
Cluster aware updates is one of the services that is not available on a one node cluster as it requires more than one node to in the cluster to be beneficial.
For an updated list of limitations please access the following link:
https://docs.microsoft.com/en-us/azure-stack/hci/concepts/single-server-clusters#known-issues
Resources
For more information, see these pages:
- Announcing Azure Stack HCI support for single-node clusters
https://techcommunity.microsoft.com/t5/azure-stack-blog/announcing-azure-stack-hci-support-for-single-node-clusters/ba-p/3408431 - Azure Stack HCI documentation: Deploy Azure Stack HCI on a single server
https://docs.microsoft.com/en-us/azure-stack/hci/deploy/single-server
Related product families
Product families related to this document are the following:
Trademarks
Lenovo and the Lenovo logo are trademarks or registered trademarks of Lenovo in the United States, other countries, or both. A current list of Lenovo trademarks is available on the Web at https://www.lenovo.com/us/en/legal/copytrade/.
The following terms are trademarks of Lenovo in the United States, other countries, or both:
Lenovo®
ThinkAgile®
The following terms are trademarks of other companies:
Microsoft®, Azure®, Hyper-V®, PowerShell, and Windows® are trademarks of Microsoft Corporation in the United States, other countries, or both.
Other company, product, or service names may be trademarks or service marks of others.
Configure and Buy
Please select a locale


